It's WordPress Wednesday!
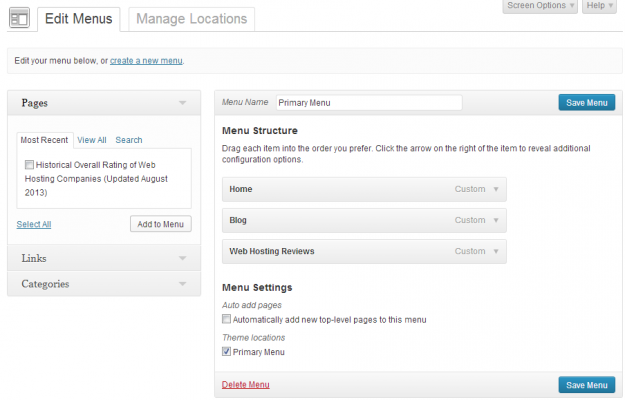
The easiest things to talk about are the things you experience yourself. Since I use WordPress for this blog, this was an issue I faced. Review Signal has a consistent theme, but WordPress runs very separate from the rest of the site. So in the Menus here I needed to highlight that you were on the blog and have it always be selected.
I created a CSS class called menuselected and then I needed to figure out how to make only that menu item have the CSS. I didn't want to hardcode it into a theme because that would mean extra work every time I wanted to change something. But it wasn't immediately obvious how I could add custom CSS to a menu. WordPress seems to hide a lot of functionality away from the user, but I found it.
Instructions
1. Go to wp-admin/nav-menus.php to edit your menus.
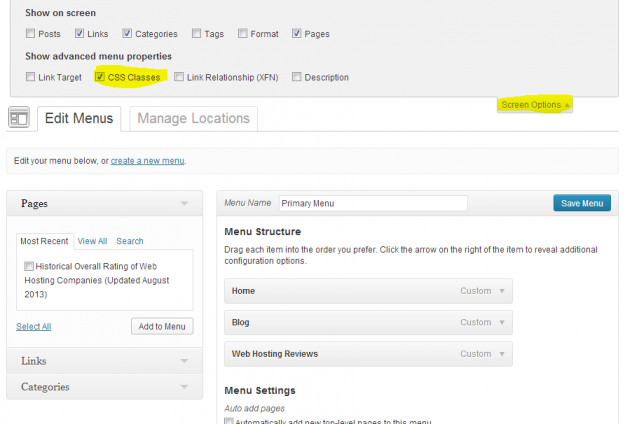
2. Click Screen Options and Check CSS Classes.
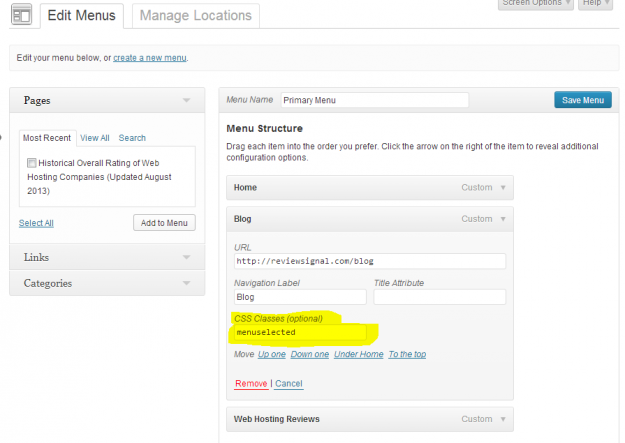
3. Click on the menu item and type in your desired CSS class.
That's it, your menu will now have your custom css class. Happy Hacking 🙂
Kevin Ohashi
Latest posts by Kevin Ohashi (see all)
- Analyzing Digital Ocean’s First Major Move with Cloudways - February 28, 2023
- Removing old companies - June 28, 2021
- WordPress & WooCommerce Hosting Performance Benchmarks 2021 - May 27, 2021


 WordPress & WooCommerce Hosting Performance Benchmarks 2021
 WooCommerce Hosting Performance Benchmarks 2020
 WordPress Hosting Performance Benchmarks (2020)
 The Case for Regulatory Capture at ICANN
 WordPress Hosting – Does Price Give Better Performance?
 Hostinger Review – 0 Stars for Lack of Ethics
 The Sinking of Site5 – Tracking EIG Brands Post Acquisition
 Dirty, Slimy, Shady Secrets of the Web Hosting Review (Under)World – Episode 1
 Free Web Hosting Offers for Startups